

How do I manually install an eSIM on an Android Phone?
Quick Setup Guide
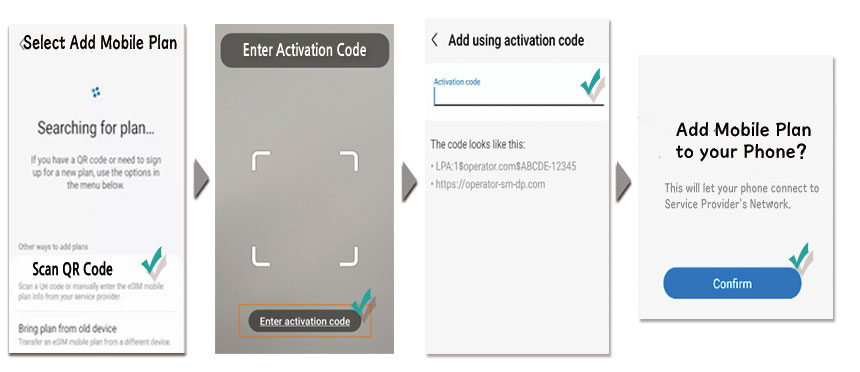
– Go to Settings > Connections
– Tap SIM Card Manager.
– Tap Add Mobile Plan.
– Scan the QR code of eSIM.
– Tap Enter Details Manually at the middle of the screen.
– Enter your SM-DP+ Address & Activation Code.
– Activate the new eSIM.
– Restart your phone if it doesn’t activate immediately.
Why Install an eSIM Manually an Android Phone?
Some eSIMs can be installed by entering the SM-DP+ Address and Activation Code instead of scanning a QR code. Manual installation is also helpful if you’re unable to complete the QR code setup.
Common situations include :
* The QR code can’t be scanned
→ The camera can’t focus properly, or the QR code is blurry or damaged.
* Your internet connection is unstable
→ A temporary network issue may interrupt the download of your eSIM profile.
* You can’t access the QR code
→ For example, you can’t display it on another device or print it for scanning.
* Your device has trouble completing the QR code setup
→ In some cases, your phone or its settings may prevent the QR code installation from completing successfully.
What is SM-DP+ Address?
The SM-DP+ Address is a unique identifier that connects your device to your carrier’s eSIM server, enabling secure activation and management of your eSIM.
How does SM-DP+ Address work?
When activating your eSIM, your phone connects to the SM-DP+ server to download your plan details and configure settings automatically. The SM-DP+ Address is essential for manual eSIM activation.