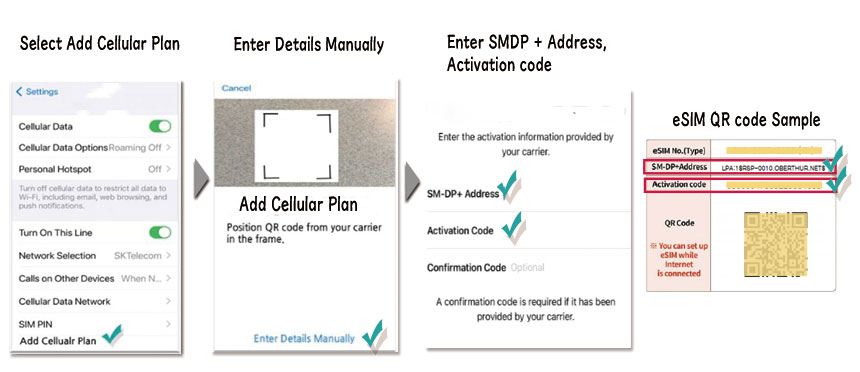
Manual Local eSIM Setup on iOS
If you encounter difficulties scanning the QR code or find that scanning is not possible, you have the option to manually input the eSIM details. Please try to do as follows.
In the Settings app > Mobile data
– Tap on “Add eSIM” in the “SIMs” section and “Use a QR code”
– At the bottom of the displayed page, tap “Enter details manually”
– Enter SM-DP+ Address :
– Enter you activation code :
– Reboot the device 1-2 times after setting eSIM.
– Check that the carrier has been selected.

What is SM-DP+ Address?
The SM-DP+ Address, often referred to as the Subscription Manager Data Preparation Address,
acts as a unique identifier directing your device to a remote server dedicated to managing eSIMs.
This address establishes a crucial link between your device and your service provider’s server,
streamlining the activation and oversight of your eSIM.
Acknowledged for its importance, the SM-DP+ Address plays a pivotal role in upholding the security and
dependability of your eSIM, guaranteeing smooth connectivity and management operations.
How does SM-DP+ Address work?
When you activate your eSIM, your phone establishes communication with the SM-DP+ server to acquire essential details about your eSIM plan from a remote source.
Upon receiving this information, your device autonomously adjusts its settings to align with the specifics of your eSIM plan.
Given the crucial significance of the SM-DP+ Address, its inclusion is indispensable for manual eSIM activation, representing a prerequisite that must be satisfied before accessing your eSIM features.

